Start with the instrument, not the formula
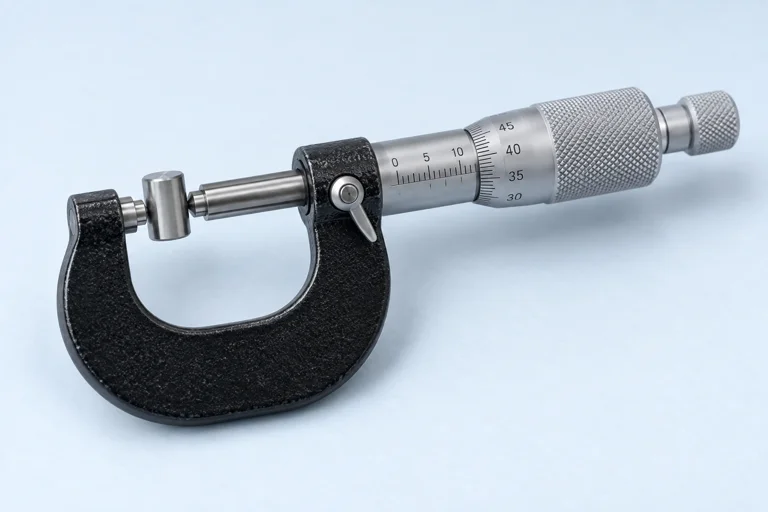
A micrometer measures a small external dimension between an anvil and a movable spindle. Turning the thimble advances the spindle using a screw. The sleeve shows complete millimetres and, on many metric instruments, half-millimetres. The thimble divides one screw revolution into smaller steps.
Before reading, identify the screw pitch and the number of thimble divisions. A common metric micrometer advances 0.5 mm per turn and has 50 divisions. Its least count is 0.5 ÷ 50 = 0.01 mm. This is scale resolution; it is not a guarantee that every measurement is accurate to 0.01 mm. Other micrometers can use different scales.
Read the sleeve, then the thimble
First find the last sleeve graduation fully exposed by the thimble edge. Include the half-millimetre mark if it is visible. Next find the thimble division aligned with the sleeve reference line. Multiply that division number by the least count, then add it to the sleeve reading.
For example, suppose the sleeve shows 7.5 mm and thimble division 23 aligns with the reference line. The thimble contribution is 23 × 0.01 = 0.23 mm. The indicated reading is therefore 7.5 + 0.23 = 7.73 mm. Keep all terms in the same unit.
Check zero before measuring
With clean measuring faces closed gently, a correctly adjusted instrument reads zero. A nonzero indication is the zero error. The corrected measurement is the indicated reading minus the signed zero error.
If the instrument indicates +0.03 mm when closed, a 7.73 mm indication becomes 7.70 mm. If its zero error is −0.02 mm, that same indication becomes 7.75 mm. State the sign explicitly: a negative error is subtracted by adding its magnitude. Do not treat a nearly complete thimble turn as a large positive zero error.
Practise with the virtual micrometer
Open the micrometer simulation below. Start with zero error set to zero. Adjust the spindle, read the visible sleeve and thimble yourself, then compare with the displayed value. Try readings either side of a half-millimetre boundary, where forgetting the exposed half-millimetre mark causes a common mistake.
Introduce a small positive zero error, repeat your measurement and apply the correction. Then try a negative error. Record the sleeve reading, thimble division, indicated result and corrected result separately so that another learner can follow your method.
What changes with real apparatus?
On a real micrometer, clean contact faces and consistent measuring force matter. Use the ratchet or force-limiting device as directed by the manufacturer; overtightening can deform a soft sample. Keep the spindle aligned with the dimension being measured and repeat the measurement at several positions if the object may be uneven.
The virtual model lets you isolate scale reading and zero correction. It does not reproduce every source of uncertainty, including thermal expansion, surface contamination and operator force. Use it to prepare for practical work, then discuss those additional limitations when interpreting real measurements.
Sources and further reading
Found an error or a confusing explanation? Send a science correction.